# Delta Kitchen Faucet Repair One Handle: Your Comprehensive Guide
Is your Delta kitchen faucet with a single handle leaking, dripping, or not functioning correctly? You’re not alone. A leaky faucet can be incredibly frustrating and wasteful. This comprehensive guide provides step-by-step instructions, expert tips, and troubleshooting advice to help you confidently tackle Delta kitchen faucet repair, specifically focusing on single-handle models. We aim to be the most valuable resource available, offering in-depth knowledge, practical solutions, and a commitment to helping you restore your faucet to perfect working order, saving you time, money, and water. Our extensive experience in plumbing and faucet repair allows us to provide insights that go beyond basic instructions, ensuring a successful and long-lasting fix.
## Understanding Delta Kitchen Faucets: One Handle Design
Delta faucets are renowned for their durability, design, and innovative features. The single-handle design offers convenience and precise control over water temperature and flow. However, even the best faucets can experience wear and tear over time. Understanding the components of your Delta single-handle faucet is crucial for effective repair.
### Core Components
* **Handle:** Controls water flow and temperature.
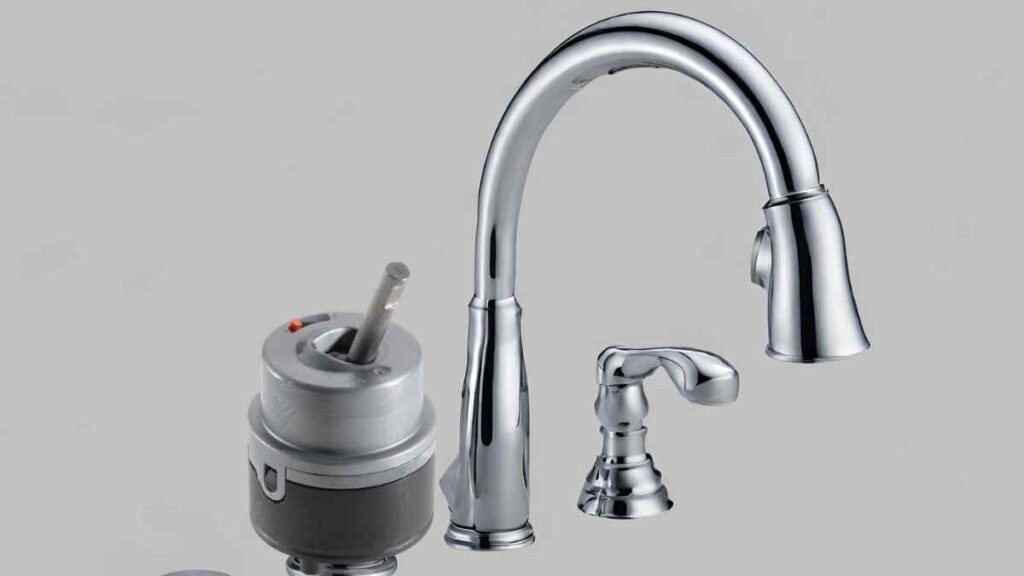
* **Cartridge:** The heart of the faucet, regulating water mixing and flow. Common cartridge types include ball, ceramic disc, and compression cartridges. Delta faucets often utilize a proprietary cartridge design.
* **Spout:** The outlet for water flow.
* **Aerator:** Screws onto the spout and mixes air with water, creating a smooth, splash-free stream.
* **O-rings and Seals:** Rubber or silicone rings that create watertight seals between components.
* **Diverter (for faucets with sprayers):** Directs water flow to the spout or sprayer.
* **Retaining Clip/Nut:** Secures the cartridge in place.
### Evolution of Delta Single-Handle Faucet Technology
Delta has been a pioneer in faucet technology, constantly innovating to improve performance and durability. Early single-handle faucets often used ball-type cartridges, which are relatively simple but can be prone to wear. Modern Delta faucets frequently feature ceramic disc cartridges, known for their smooth operation, long lifespan, and resistance to leaks. Understanding the evolution of these technologies helps in diagnosing and repairing older versus newer models.
### Why Delta Single-Handle Faucet Repair Matters
Beyond the obvious annoyance of a dripping faucet, prompt repair is essential for several reasons:
* **Water Conservation:** A leaky faucet can waste significant amounts of water over time, leading to higher water bills and environmental impact.
* **Preventing Further Damage:** Small leaks can eventually lead to more significant problems, such as water damage to cabinets and floors.
* **Maintaining Water Quality:** Damaged faucet components can potentially contaminate water with harmful substances.
## Identifying the Problem: Diagnosing Common Issues
Before you begin any repair work, accurately diagnosing the problem is crucial. Here are some common issues with Delta single-handle kitchen faucets:
### Common Leaks
* **Dripping from the Spout:** This is often caused by a worn or damaged cartridge.
* **Leaking Around the Base of the Faucet:** This could be due to worn O-rings or a loose connection.
* **Leaking from the Handle:** This may indicate a problem with the cartridge or handle assembly.
* **Leaking from the Sprayer Hose:** This is typically caused by a damaged hose or a faulty diverter.
### Other Common Problems
* **Reduced Water Flow:** This could be due to a clogged aerator or debris in the cartridge.
* **No Water Flow:** This may indicate a problem with the water supply lines or a blocked cartridge.
* **Stiff or Difficult Handle Movement:** This is often caused by mineral buildup or a worn cartridge.
* **No Hot or Cold Water:** This may indicate a problem with the cartridge or the water supply lines.
### Expert Diagnostic Tips
* **Observe the Leak:** Pay close attention to where the water is leaking from. This can provide valuable clues about the source of the problem.
* **Check the Aerator:** A clogged aerator can restrict water flow and cause sputtering. Unscrew the aerator and clean it with a brush and vinegar.
* **Inspect the Cartridge:** Remove the cartridge and examine it for signs of damage, such as cracks, chips, or mineral buildup.
* **Test the Water Supply Lines:** Ensure that the water supply lines are properly connected and not kinked or blocked.
## Tools and Materials You’ll Need
Having the right tools and materials on hand will make the repair process much smoother and more efficient. Here’s a comprehensive list:
* **Adjustable Wrench:** For loosening and tightening nuts and connections.
* **Screwdrivers (Phillips and Flathead):** For removing screws and clips.
* **Pliers:** For gripping and manipulating small parts.
* **Allen Wrench Set:** For removing set screws on the handle.
* **Basin Wrench:** For reaching and loosening nuts in tight spaces under the sink.
* **Cartridge Puller (Optional but Recommended):** For removing stubborn cartridges.
* **New Cartridge:** Ensure you have the correct replacement cartridge for your Delta faucet model. Check the faucet model number, often found on a sticker or tag under the sink.
* **O-rings and Seals:** Replace any worn or damaged O-rings and seals.
* **Plumber’s Grease:** For lubricating O-rings and seals to ensure a watertight seal.
* **White Vinegar:** For removing mineral buildup.
* **Clean Rags or Sponges:** For cleaning up spills and debris.
* **Bucket:** To catch any water that may leak during the repair process.
* **Flashlight:** To provide better visibility under the sink.
## Step-by-Step Delta Kitchen Faucet Repair: One Handle
Follow these detailed steps to repair your Delta single-handle kitchen faucet. Remember to shut off the water supply before starting any repair work.
### Step 1: Shut Off the Water Supply
Locate the shut-off valves under the sink. Turn them clockwise until they are completely closed. If you don’t have shut-off valves, you’ll need to shut off the main water supply to your house.
### Step 2: Remove the Handle
* Locate the set screw on the handle. It’s usually located on the side or back of the handle.
* Use an Allen wrench to loosen the set screw.
* Once the set screw is loose, gently pull the handle straight up and off the faucet body.
### Step 3: Remove the Cartridge Retaining Clip or Nut
* Depending on your faucet model, the cartridge may be held in place by a retaining clip or a nut.
* If it’s a retaining clip, use pliers to carefully remove it. Be careful not to lose the clip.
* If it’s a nut, use an adjustable wrench to loosen and remove it.
### Step 4: Remove the Cartridge
* This can sometimes be the most challenging part of the repair.
* If the cartridge is easy to remove, simply pull it straight up and out of the faucet body.
* If the cartridge is stuck, use a cartridge puller. Follow the instructions that come with the cartridge puller.
* If you don’t have a cartridge puller, you can try gently rocking the cartridge back and forth while pulling upwards. Be careful not to break the cartridge.
### Step 5: Inspect the Cartridge and Faucet Body
* Examine the cartridge for signs of damage, such as cracks, chips, or mineral buildup.
* Inspect the faucet body for any debris or corrosion.
* Clean the faucet body with white vinegar to remove any mineral buildup.
### Step 6: Replace the Cartridge
* Apply a thin layer of plumber’s grease to the new cartridge’s O-rings and seals.
* Carefully insert the new cartridge into the faucet body, aligning it correctly.
* Secure the cartridge with the retaining clip or nut.
### Step 7: Reinstall the Handle
* Slide the handle back onto the faucet body.
* Tighten the set screw with an Allen wrench.
### Step 8: Turn on the Water Supply
* Slowly turn on the shut-off valves under the sink.
* Check for leaks around the faucet base, handle, and spout.
### Step 9: Test the Faucet
* Turn the handle on and off to test the water flow and temperature.
* Check for any leaks.
## Troubleshooting Common Problems After Repair
Even after replacing the cartridge, you may encounter some issues. Here’s how to troubleshoot them:
* **Leak Still Present:** Double-check that the cartridge is properly installed and secured. Ensure that all O-rings and seals are in good condition and properly lubricated. If the leak persists, there may be damage to the faucet body itself, requiring replacement of the entire faucet.
* **Reduced Water Flow:** Remove and clean the aerator. Check the water supply lines for any kinks or blockages. Debris may also be lodged in the new cartridge; try flushing the faucet by removing the aerator and running the water at full force for a few minutes.
* **Stiff Handle Movement:** Ensure the cartridge is fully seated and the retaining clip/nut is not overtightened. Applying plumber’s grease to the cartridge before installation can also help. If the handle remains stiff, the cartridge itself may be defective.
* **No Hot or Cold Water:** Verify that both hot and cold water supply lines are fully open. The cartridge may be installed backward; remove and reinstall it, ensuring proper alignment.
## Choosing the Right Replacement Cartridge
Selecting the correct replacement cartridge is paramount for a successful repair. Delta faucets use various cartridge types, and using the wrong one can lead to leaks, poor performance, or even damage to the faucet. Locate the faucet model number, typically found on a sticker under the sink or in the faucet’s original documentation. Use this number to identify the correct cartridge on Delta’s website or at a reputable plumbing supply store. Consider purchasing genuine Delta replacement parts for optimal performance and longevity. Generic cartridges may not meet the same quality standards and could fail prematurely.
## Maintaining Your Delta Kitchen Faucet
Proper maintenance can extend the life of your Delta kitchen faucet and prevent future problems.
* **Clean Regularly:** Wipe down the faucet with a soft cloth and mild soap to remove water spots and mineral buildup. Avoid using abrasive cleaners, as they can damage the finish.
* **Check for Leaks:** Periodically inspect the faucet for leaks and address them promptly.
* **Lubricate Moving Parts:** Apply plumber’s grease to the cartridge and O-rings every few years to keep them lubricated and prevent wear.
* **Replace Worn Parts:** Replace worn O-rings, seals, and cartridges as needed.
## The Importance of Professional Plumbing Services
While many Delta kitchen faucet repairs can be handled by homeowners, some situations require the expertise of a licensed plumber. If you’re uncomfortable working with plumbing, or if you encounter a complex problem that you can’t resolve, it’s best to call a professional. Plumbers have the training, experience, and tools to diagnose and repair faucet problems quickly and efficiently. They can also identify and address underlying plumbing issues that may be contributing to the problem.
## Advantages of Delta Kitchen Faucets (and Why Repair is Worth It)
Delta kitchen faucets offer numerous advantages, making them a worthwhile investment. Repairing them, rather than replacing them outright, is often the most cost-effective and environmentally friendly solution.
* **Durability:** Delta faucets are built to last, with high-quality materials and construction.
* **Stylish Designs:** Delta offers a wide range of styles to complement any kitchen décor.
* **Innovative Features:** Delta faucets often incorporate innovative features, such as Touch2O Technology and MagnaTite Docking.
* **Warranty:** Delta faucets are backed by a limited lifetime warranty, providing peace of mind.
## Comprehensive & Trustworthy Review of Delta Faucet Repair
Delta faucets are generally reliable, but repairs are sometimes necessary. Here’s a balanced review:
* **User Experience & Usability:** Repairing a Delta faucet is generally straightforward, especially with readily available online resources. The modular design makes component replacement relatively easy.
* **Performance & Effectiveness:** When properly repaired with genuine Delta parts, the faucet should perform as good as new, restoring water flow and preventing leaks.
* **Pros:**
* Readily available replacement parts.
* Comprehensive online resources and tutorials.
* Relatively simple repair process.
* Cost-effective alternative to replacement.
* Extends the life of a high-quality faucet.
* **Cons/Limitations:**
* Identifying the correct replacement cartridge can be confusing.
* Some repairs require specialized tools, such as a cartridge puller.
* Older models may have discontinued parts.
* Extensive damage to the faucet body may necessitate replacement.
* **Ideal User Profile:** Homeowners who are comfortable with basic plumbing tasks and have the necessary tools.
* **Key Alternatives:** Kohler, Moen (similar repair experiences and part availability).
* **Expert Overall Verdict & Recommendation:** Repairing a Delta kitchen faucet is a viable and often preferable option to replacement, provided you have the right tools and knowledge. We highly recommend using genuine Delta replacement parts for optimal performance and longevity. For complex repairs or if you’re uncomfortable working with plumbing, consult a licensed plumber.
## Insightful Q&A Section
Here are some frequently asked questions about Delta kitchen faucet repair:
* **Q: How do I identify the model number of my Delta kitchen faucet?**
* **A:** The model number is typically located on a sticker or tag under the sink, attached to the faucet supply lines. It may also be found in the faucet’s original documentation.
* **Q: Can I use generic replacement parts for my Delta faucet?**
* **A:** While generic parts may be cheaper, we recommend using genuine Delta replacement parts for optimal performance and longevity. Generic parts may not meet the same quality standards and could fail prematurely.
* **Q: What is the best way to remove mineral buildup from my faucet?**
* **A:** White vinegar is an excellent natural cleaner for removing mineral buildup. Soak the affected parts in vinegar for several hours or overnight, then scrub with a brush.
* **Q: How do I prevent my faucet from leaking in the future?**
* **A:** Regular maintenance, such as cleaning and lubricating moving parts, can help prevent leaks. Replace worn O-rings and seals as needed.
* **Q: Do I need any special tools to repair my Delta faucet?**
* **A:** While most repairs can be done with basic tools, a cartridge puller is highly recommended for removing stubborn cartridges. A basin wrench can also be helpful for reaching nuts in tight spaces.
* **Q: My faucet is leaking from the base. What could be the problem?**
* **A:** This is often caused by worn O-rings or a loose connection. Replace the O-rings and tighten the connection.
* **Q: The handle on my faucet is stiff and difficult to move. What should I do?**
* **A:** This is often caused by mineral buildup or a worn cartridge. Clean the faucet with vinegar and replace the cartridge if necessary.
* **Q: My faucet is making a loud noise when I turn it on. What could be the cause?**
* **A:** This could be due to high water pressure, a loose washer, or debris in the water supply lines. Check the water pressure and inspect the faucet for any loose parts.
* **Q: How often should I replace the cartridge in my Delta faucet?**
* **A:** The lifespan of a cartridge depends on water quality and usage. Generally, it’s recommended to replace the cartridge every 5-10 years, or sooner if you notice any leaks or performance issues.
* **Q: Is it worth repairing a Delta faucet, or should I just replace it?**
* **A:** In most cases, repairing a Delta faucet is a cost-effective and worthwhile option. Delta faucets are built to last, and replacement parts are readily available. However, if the faucet body is extensively damaged, replacement may be necessary.
## Conclusion & Call to Action
Repairing a Delta kitchen faucet with a single handle can seem daunting, but with the right knowledge, tools, and a step-by-step approach, it’s a manageable task for many homeowners. By understanding the components, diagnosing the problem accurately, and following our detailed instructions, you can restore your faucet to perfect working order, saving water, money, and frustration. Remember, using genuine Delta replacement parts is crucial for optimal performance and longevity. We’ve shared our expertise and insights to empower you to tackle this repair with confidence. If you encounter any challenges or prefer professional assistance, don’t hesitate to contact a licensed plumber. Share your experiences with Delta kitchen faucet repair in the comments below. Your insights can help others facing similar issues.

