Pull Out Faucet Hose Replacement: The Ultimate Expert Guide
Are you struggling with a leaky or malfunctioning pull out faucet? A faulty hose is often the culprit. Replacing it might seem daunting, but with the right knowledge and tools, it’s a manageable DIY project. This comprehensive guide will walk you through every step of the process, from identifying the right replacement hose to troubleshooting common issues. We’ll not only show you *how* to replace the hose, but also provide expert tips and insights to ensure a long-lasting and leak-free repair. We’ve compiled years of plumbing experience and research to bring you the most authoritative and trustworthy guide available on pull out faucet hose replacement. This isn’t just another how-to article; it’s a deep dive into everything you need to know, ensuring your faucet is functioning perfectly again.
Understanding the Pull Out Faucet Hose
The pull out faucet, a modern kitchen staple, offers unparalleled convenience with its extendable spray head. However, this design relies on a flexible hose that’s constantly subjected to movement, pressure, and temperature fluctuations. Over time, this can lead to wear and tear, resulting in leaks, reduced water pressure, or even complete hose failure. Understanding the anatomy and common issues of these hoses is crucial for effective troubleshooting and repair.
What is a Pull Out Faucet Hose?
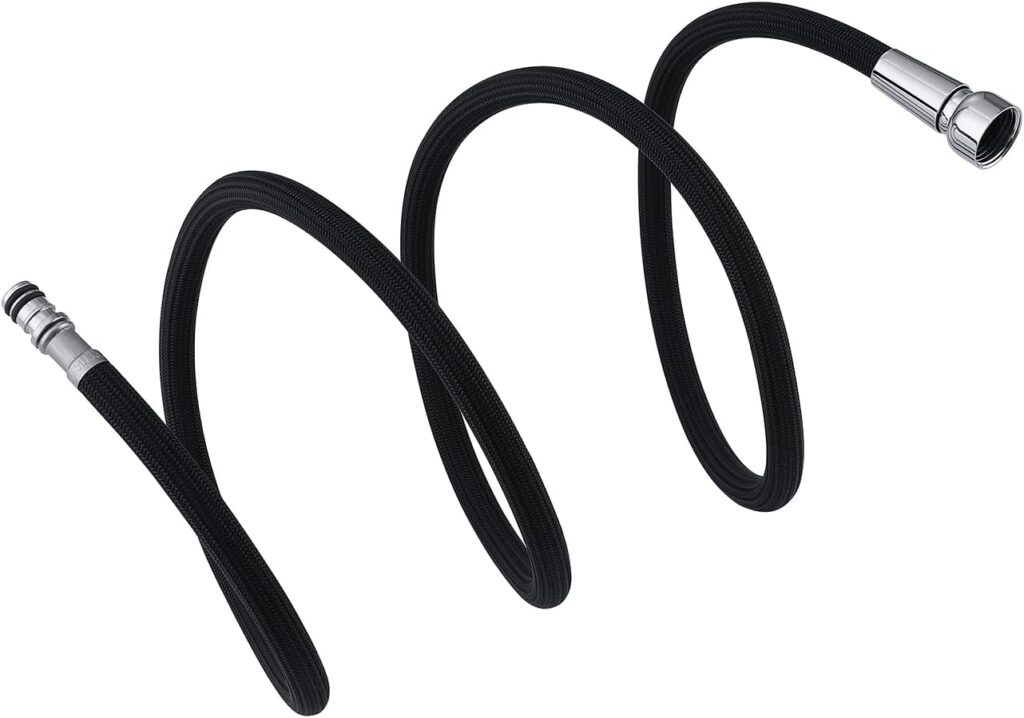
The pull out faucet hose is a flexible tube, typically made of reinforced rubber, braided nylon, or PEX, that connects the faucet valve to the spray head. It allows the spray head to be pulled out and used for rinsing dishes, cleaning the sink, or filling pots. The hose is usually concealed within the faucet body and counter, making it less visible but also more susceptible to undetected leaks.
Common Problems with Pull Out Faucet Hoses
Several issues can plague pull out faucet hoses:
* **Leaks:** These are the most common problem, often occurring at the connection points (where the hose connects to the faucet valve or spray head) or along the hose itself due to cracks or punctures.
* **Reduced Water Pressure:** A kinked or partially blocked hose can restrict water flow, resulting in weak spray pressure.
* **Hose Deterioration:** Over time, the hose material can degrade due to exposure to chemicals, minerals in the water, or constant flexing.
* **Spray Head Malfunction:** Sometimes, the issue isn’t the hose itself but a problem with the spray head, such as mineral buildup or a faulty diverter valve. However, a damaged hose can contribute to these issues.
* **Retraction Issues:** The retraction mechanism relies on the hose’s flexibility and smooth movement. A damaged or stiff hose can hinder proper retraction.
Types of Pull Out Faucet Hoses
Understanding the different types of hoses is essential for choosing the right replacement:
* **Rubber Hoses:** These are the most common and typically the least expensive. They’re flexible but can be prone to cracking and deterioration over time.
* **Braided Nylon Hoses:** These offer increased durability and resistance to kinking compared to rubber hoses. The nylon braiding provides extra strength and protection.
* **PEX Hoses:** PEX (cross-linked polyethylene) is a highly durable and flexible plastic material that’s resistant to high temperatures and chemicals. PEX hoses are a premium option offering long-lasting performance.
The Importance of Proper Hose Selection
Choosing the correct replacement hose is crucial for a successful repair. Consider the following factors:
* **Length:** Ensure the replacement hose is the same length as the original. Too short, and the spray head won’t reach; too long, and it can interfere with the retraction mechanism.
* **Connection Type:** Faucet hoses typically use threaded connections or quick-connect fittings. Identify the type used in your faucet and choose a replacement hose with the same connection type.
* **Material:** Opt for a durable material like braided nylon or PEX for longer-lasting performance.
* **Compatibility:** Check the faucet manufacturer’s specifications to ensure the replacement hose is compatible with your faucet model. Incompatible hoses can lead to leaks or damage to the faucet.
Replacing Your Pull Out Faucet Hose: A Step-by-Step Guide
Replacing a pull out faucet hose is a relatively straightforward DIY project that can save you the cost of hiring a plumber. Here’s a detailed step-by-step guide:
Tools and Materials You’ll Need
* **New Pull Out Faucet Hose:** Ensure it’s compatible with your faucet.
* **Adjustable Wrench:** For loosening and tightening connections.
* **Basin Wrench (Optional):** Helpful for reaching tight spaces under the sink.
* **Pliers:** For gripping and maneuvering small parts.
* **Bucket or Towel:** To catch any water spills.
* **Penetrating Oil (Optional):** To loosen stubborn connections.
* **Flashlight:** To illuminate the work area.
* **Safety Glasses:** To protect your eyes.
Step 1: Turn Off the Water Supply
Before starting any plumbing work, it’s crucial to turn off the water supply to the faucet. Locate the shut-off valves under the sink (usually one for hot water and one for cold water) and turn them clockwise until they’re completely closed. If you don’t have shut-off valves, you’ll need to turn off the main water supply to your house.
Step 2: Disconnect the Old Hose
* **Disconnect from the Spray Head:** Gently pull the spray head out as far as it will go. Locate the connection point where the hose attaches to the spray head. This is usually a threaded connection or a quick-connect fitting. Use the adjustable wrench or pliers to loosen the connection and carefully disconnect the hose. Have a bucket or towel ready to catch any water that may spill out.
* **Disconnect from the Faucet Valve:** Trace the hose down to where it connects to the faucet valve. This connection is usually located under the sink. Use the adjustable wrench or basin wrench (if needed) to loosen the connection and carefully disconnect the hose. Again, be prepared for water spillage.
* **Remove the Old Hose:** Once both ends are disconnected, carefully pull the old hose out from the faucet body. You may need to gently wiggle it to free it from any obstructions.
Step 3: Install the New Hose
* **Connect to the Faucet Valve:** Thread the new hose through the faucet body, following the same path as the old hose. Connect the hose to the faucet valve, tightening the connection securely with the adjustable wrench or basin wrench. Avoid over-tightening, which can damage the connection.
* **Connect to the Spray Head:** Connect the other end of the hose to the spray head, tightening the connection securely with the adjustable wrench or pliers. Again, avoid over-tightening.
Step 4: Check for Leaks
* **Turn on the Water Supply:** Slowly turn on the water supply to the faucet. Check all connection points for leaks. If you see any leaks, tighten the connections slightly until they stop. If tightening doesn’t solve the problem, disconnect the hose and inspect the connections for damage or debris.
* **Test the Spray Head:** Pull out the spray head and test its functionality. Check for leaks around the spray head and hose. Ensure the spray head retracts smoothly and completely.
Step 5: Final Inspection
* **Inspect the Entire Hose:** Carefully inspect the entire length of the hose for any kinks, twists, or signs of damage. Ensure the hose is not rubbing against any sharp edges or obstructions that could cause wear and tear.
* **Clean Up:** Clean up any water spills and dispose of the old hose properly.
Troubleshooting Common Issues After Pull Out Faucet Hose Replacement
Even after a successful hose replacement, you might encounter some issues. Here’s how to troubleshoot them:
Leak at the Connections
* **Cause:** Loose connections, damaged threads, or worn-out washers.
* **Solution:** Tighten the connections slightly. If the leak persists, disconnect the hose and inspect the threads for damage. Replace any worn-out washers. You may need to use Teflon tape on the threads for a tighter seal.
Reduced Water Pressure
* **Cause:** Kinked hose, partially blocked hose, or low water pressure in the supply lines.
* **Solution:** Straighten any kinks in the hose. Disconnect the hose and flush it out to remove any debris. Check the water pressure in your supply lines to ensure it’s adequate.
Spray Head Not Retracting Properly
* **Cause:** Stiff hose, obstructed retraction mechanism, or weak retraction weight.
* **Solution:** Ensure the hose is not kinked or twisted. Check the retraction mechanism for any obstructions. If the retraction weight is weak, consider replacing it.
Dripping Spray Head
* **Cause:** Worn-out O-rings in the spray head, mineral buildup, or faulty diverter valve.
* **Solution:** Disassemble the spray head and inspect the O-rings for wear and tear. Replace any worn-out O-rings. Clean the spray head to remove mineral buildup. If the diverter valve is faulty, you may need to replace the entire spray head.
Choosing the Right Replacement Pull Out Faucet Hose: Key Considerations
Selecting the right replacement hose is paramount for a successful and long-lasting repair. Here’s a more detailed look at the key factors to consider:
Hose Material
* **Rubber:** Affordable and flexible, but less durable and prone to cracking.
* **Braided Nylon:** More durable and kink-resistant than rubber, offering a good balance of price and performance.
* **PEX:** The most durable and heat-resistant option, ideal for demanding applications.
Hose Length
* **Measure the Old Hose:** The easiest way to determine the correct length is to measure the old hose before removing it. If that’s not possible, consult the faucet manufacturer’s specifications.
* **Avoid Excess Length:** Too much hose can interfere with the retraction mechanism and create clutter under the sink.
Connection Type
* **Threaded Connections:** These use standard pipe threads and require a wrench for tightening.
* **Quick-Connect Fittings:** These use a clip or push-fit mechanism for easy installation and removal.
* **Ensure Compatibility:** Make sure the replacement hose has the same connection type as your faucet.
Faucet Compatibility
* **Consult the Manufacturer:** Check the faucet manufacturer’s website or documentation for recommended replacement hoses.
* **Consider Universal Hoses:** Some hoses are designed to be compatible with a wide range of faucet models.
Maintaining Your Pull Out Faucet Hose for Longevity
Proper maintenance can significantly extend the lifespan of your pull out faucet hose:
* **Avoid Kinking:** Be careful not to kink or twist the hose when using the spray head.
* **Regular Cleaning:** Periodically clean the hose with mild soap and water to remove dirt and grime.
* **Inspect Regularly:** Check the hose for leaks, cracks, or other signs of damage.
* **Replace When Necessary:** Don’t wait until the hose fails completely. Replace it proactively if you notice any signs of wear and tear.
Delta Faucet Hose Replacement: A Closer Look
Delta is a leading brand in faucets, and their pull out faucets are known for their quality and durability. However, even Delta faucet hoses can eventually require replacement. The Delta Faucet RP70835 is a common replacement hose for many Delta pull out kitchen faucets. It’s a braided hose and comes with quick connect fittings. Always verify compatibility with your specific Delta faucet model before purchasing.
Specific Considerations for Delta Faucets
* **Delta’s Diamond Seal Technology:** Many Delta faucets feature Diamond Seal Technology, which uses a diamond-embedded ceramic disc valve for long-lasting leak-free performance. However, the hose itself can still be a point of failure.
* **Delta Quick-Connect Fittings:** Delta faucets often use quick-connect fittings, which make hose replacement easier. Ensure the replacement hose has compatible quick-connect fittings.
* **Delta Parts Database:** Delta maintains an extensive online parts database where you can find the correct replacement hose for your specific faucet model.
Why Choose Professional Help for Pull Out Faucet Hose Replacement?
While replacing a pull out faucet hose is often a DIY-friendly task, there are situations where professional help is recommended:
* **Complex Faucet Design:** Some faucets have intricate designs that make hose replacement difficult.
* **Stubborn Connections:** If you’re unable to loosen the connections, you risk damaging the faucet or plumbing.
* **Under-Sink Obstructions:** Limited space or obstructions under the sink can make the job challenging.
* **Uncertainty:** If you’re not confident in your plumbing skills, it’s best to call a professional.
Advantages of Replacing Your Pull Out Faucet Hose
Replacing a worn-out pull out faucet hose offers several advantages:
* **Eliminates Leaks:** A new hose will eliminate leaks, saving water and preventing water damage.
* **Restores Water Pressure:** A clean, unobstructed hose will restore optimal water pressure.
* **Improves Spray Head Functionality:** A new hose will allow the spray head to function properly, retract smoothly, and provide consistent spray patterns.
* **Extends Faucet Lifespan:** Replacing a worn-out hose can prevent further damage to the faucet and extend its lifespan.
* **Cost Savings:** Replacing the hose is much cheaper than replacing the entire faucet.
Pull Out Faucet Hose Replacement: A Review of Aftermarket Options
When replacing a pull out faucet hose, you have the option of using an original equipment manufacturer (OEM) hose or an aftermarket hose. Here’s a review of aftermarket options:
###Pros of Aftermarket Hoses
* **Lower Cost:** Aftermarket hoses are often cheaper than OEM hoses.
* **Wider Availability:** Aftermarket hoses are typically easier to find and purchase.
* **Improved Materials:** Some aftermarket hoses use higher-quality materials than OEM hoses.
###Cons of Aftermarket Hoses
* **Compatibility Issues:** Aftermarket hoses may not be compatible with all faucet models.
* **Quality Concerns:** The quality of aftermarket hoses can vary widely.
* **Warranty Issues:** Using an aftermarket hose may void the faucet’s warranty.
###Key Considerations When Choosing an Aftermarket Hose
* **Compatibility:** Ensure the hose is compatible with your faucet model.
* **Quality:** Choose a hose from a reputable manufacturer.
* **Reviews:** Read online reviews to get feedback from other users.
Aftermarket hoses can be a good option if you’re looking to save money, but it’s important to do your research and choose a high-quality, compatible hose.
Expert Q&A: Pull Out Faucet Hose Replacement
Here are some frequently asked questions about pull out faucet hose replacement, answered by our team of plumbing experts:
**Q1: How often should I replace my pull out faucet hose?**
A: It depends on the quality of the hose and the frequency of use. As a general rule, it’s a good idea to inspect the hose annually and replace it every 5-7 years, or sooner if you notice any signs of wear and tear.
**Q2: Can I use a universal pull out faucet hose?**
A: Yes, universal hoses are designed to be compatible with a wide range of faucet models. However, it’s important to ensure the hose has the correct length and connection type for your faucet.
**Q3: What’s the best material for a pull out faucet hose?**
A: PEX is generally considered the best material due to its durability, heat resistance, and chemical resistance. Braided nylon is a good alternative that offers a balance of price and performance.
**Q4: How do I prevent my pull out faucet hose from kinking?**
A: Avoid twisting or pulling the hose excessively. Ensure the hose is properly routed and not obstructed by anything under the sink.
**Q5: Can I repair a leaky pull out faucet hose?**
A: It’s generally not recommended to repair a leaky hose. It’s better to replace it with a new one to ensure a reliable and long-lasting repair.
**Q6: What tools do I need to replace a pull out faucet hose?**
A: You’ll need an adjustable wrench, pliers, a bucket or towel, a flashlight, and safety glasses. A basin wrench can be helpful for reaching tight spaces.
**Q7: How do I know if my pull out faucet hose needs to be replaced?**
A: Look for signs of leaks, cracks, reduced water pressure, or spray head malfunction.
**Q8: Can I replace the pull out faucet hose myself, or should I hire a plumber?**
A: Replacing a pull out faucet hose is often a DIY-friendly task. However, if you’re not confident in your plumbing skills or encounter any difficulties, it’s best to call a plumber.
**Q9: How do I choose the right length of pull out faucet hose?**
A: Measure the old hose before removing it, or consult the faucet manufacturer’s specifications.
**Q10: What is the most common cause of pull out faucet hose failure?**
A: The most common cause is wear and tear from constant flexing and exposure to water and chemicals.
Conclusion: Ensuring a Leak-Free Future with Your Pull Out Faucet
Replacing your pull out faucet hose might seem like a minor task, but it’s crucial for maintaining the functionality and longevity of your faucet. By understanding the different types of hoses, following our step-by-step guide, and troubleshooting common issues, you can confidently tackle this DIY project and enjoy a leak-free, high-performing faucet for years to come. Remember to always prioritize safety, choose quality replacement parts, and consult a professional if you’re unsure about any aspect of the process. Your kitchen faucet is a workhorse, and a little maintenance goes a long way. Share your experiences with pull out faucet hose replacement in the comments below! Explore our advanced guide to faucet maintenance for more tips and tricks.

